Clean hardwood floors without damage by using as little water as possible and drying quickly, as standing water is the primary cause of damage. Identify your floor's finish type to choose the correct cleaning products and methods, as surface-sealed floors differ from oiled or waxed ones.
- The golden rule for cleaning hardwood floors is to use minimal water and dry the floor quickly to prevent swelling and warping.
- Never wet-mop or steam-mop sealed wood floors, as these methods force moisture into the wood and finish.
- Identify your floor's finish type (surface-sealed, oiled, or waxed) before cleaning to avoid damage or voiding warranties.
- Surface-sealed floors are the most common and are best cleaned with a damp microfiber mop and pH-neutral cleaner.
- Engineered hardwood is cleaned like solid wood but tolerates even less standing water due to its thin veneer.
- Always consult the manufacturer's care sheet for your specific finish, as it overrides general advice.
Identify Finish Type
Determine if your floor is surface-sealed, oiled, or waxed.
Dry Clean First
Dust-mop or vacuum to remove loose debris.
Damp Clean Gently
Use a barely damp microfiber mop with a pH-neutral cleaner.
Dry Immediately
Wipe the floor dry after any damp cleaning.
Learning how to clean hardwood floors without wrecking them comes down to one rule that overrides every product claim and viral hack: use as little water as possible, and never let liquid sit. Wood is hygroscopic, meaning it drinks up moisture and swells. A finish slows that process but does not stop it, which is why cleaning pros insist that the finish on top and the habits you build matter far more than the brand of cleaner in the bottle. This guide walks through the full routine, from the daily dust-mop to the once-a-decade refinish, with specific attention to the finish type you actually have, the vinegar debate, and the small mistakes that quietly ruin boards over years.
Avoid soap-based or "mop-and-shine" products on engineered and laminate surfaces, as they leave a dulling film.
What is the golden rule for cleaning hardwood floors?
The golden rule is minimal water, applied with a damp cloth or mop and dried quickly. “Golden rule” is not an industry standard; it is the consensus you will hear from nearly every flooring professional and cleaning guide. Standing water is the enemy. It only takes a small amount of pooled liquid to seep into the seams between planks, where it causes swelling, warping, and cupping (boards that curl up at the edges). Sealed floors are not waterproof. The seal reduces surface absorption, but water still finds the gaps where boards meet, and worn or aged finishes let it through faster.
Two practices follow directly from this rule. First, never wet-mop or steam-mop a sealed wood floor. A sopping string mop dumps far more water than wood can tolerate, and a steam mop forces hot moisture into the finish and the wood beneath it. The National Wood Flooring Association (NWFA), the main US trade body for wood floors, warns that steam and traditional wet mopping damage the finish and the wood over time. Second, dry the floor after any damp cleaning. A pass with a clean, dry microfiber cloth or a fresh mop head pulls up the last of the moisture before it can soak in, which also happens to be the single best way to clean wood floors without streaks.
Why does knowing your finish matter before you clean?
Before you pick a cleaner or a method, identify what is actually protecting your wood. The wrong product on the wrong finish can dull it, leave a haze, or void a manufacturer warranty. Finishes fall into two broad camps, and the easiest field test is simple: rub a few drops of water on an inconspicuous spot. If the water beads and sits on top, you likely have a surface-sealed floor. If it soaks in or leaves a dark mark, the finish is penetrating (oiled or waxed) and needs gentler handling.
Surface-sealed floors are the most common in modern US homes. These are coated with polyurethane, urethane, or an acrylic/UV-cured finish that forms a protective film over the wood. They are the most water-resistant and the most forgiving to clean. A damp microfiber mop and a pH-neutral wood cleaner are all you need. Do not wax them; wax will not bond to a urethane surface and can leave a film that interferes with any future recoat.
Oiled floors use a penetrating oil (often a hardwax oil) that soaks into the wood rather than sitting on top. They have a lower-sheen, natural look and are repairable in place. Clean them with minimal water and a cleaner formulated for oiled floors, and periodically re-oil them to restore protection and depth rather than stripping and recoating.
Waxed floors are typical of older homes and some reclaimed installs. Wax is the most moisture-sensitive finish of all, so wet mopping is never appropriate. Maintenance means buffing, and when the wax dulls or builds up unevenly, stripping and re-waxing rather than applying a water-based polish.
When you genuinely cannot tell, or the floor is new to you, default to the most conservative approach: dry cleaning plus a barely damp microfiber pad with a pH-neutral cleaner, and consult the manufacturer’s care sheet. That documentation wins every argument in this guide, because the company that made your finish knows what its own warranty allows.
How do you clean engineered hardwood?
Engineered hardwood is a real-wood veneer bonded over a plywood or high-density core. The surface you walk on is genuine wood, so it is cleaned exactly like solid wood of the same finish; what changes is the margin for error. The veneer layer is thin, so engineered floors tolerate even less standing water, and most can only be sanded and refinished a limited number of times (sometimes just once, sometimes not at all on very thin wear layers).
Most engineered floors ship surface-sealed with a factory UV-cured or aluminum-oxide finish, which is extremely durable against scuffs but still vulnerable to moisture at the seams. The practical routine is the same: dry dust-mop or vacuum first, then a lightly damp microfiber pad with a pH-neutral cleaner, then dry. The things to avoid are specific and worth repeating: no soap-based or “mop-and-shine” products, which leave a dulling film on engineered and laminate surfaces, and absolutely no steam, which can cause irreversible damage by driving heat and moisture into the glue line that holds the veneer to the core. If your engineered floor has an oiled finish instead of a sealed one, treat it as an oiled floor and use the matching cleaner. As always, the manufacturer’s instructions override general advice, especially for warranty coverage.
What is the best way to mop hardwood floors step by step?
The best way to mop hardwood floors is to dust first, use a flat microfiber mop with a well-wrung pad, work with the grain, and dry as you go. Here is the full routine, in order.
- Dust or vacuum first, every time. Grit is sandpaper underfoot. Sweep with a microfiber dust mop or vacuum on the bare-floor or hard-floor setting (beater bar off, so the brush roll does not scratch). This step removes the particles that cause fine scratches and that turn into muddy streaks the moment they get wet.
- Mix or choose your cleaner. Use a ready-made pH-neutral wood floor cleaner, or a spray-bottle solution of a few drops of mild dish soap in warm water. Avoid dumping cleaner into a bucket you will slosh around; a spray bottle lets you control exactly how much liquid touches the floor.
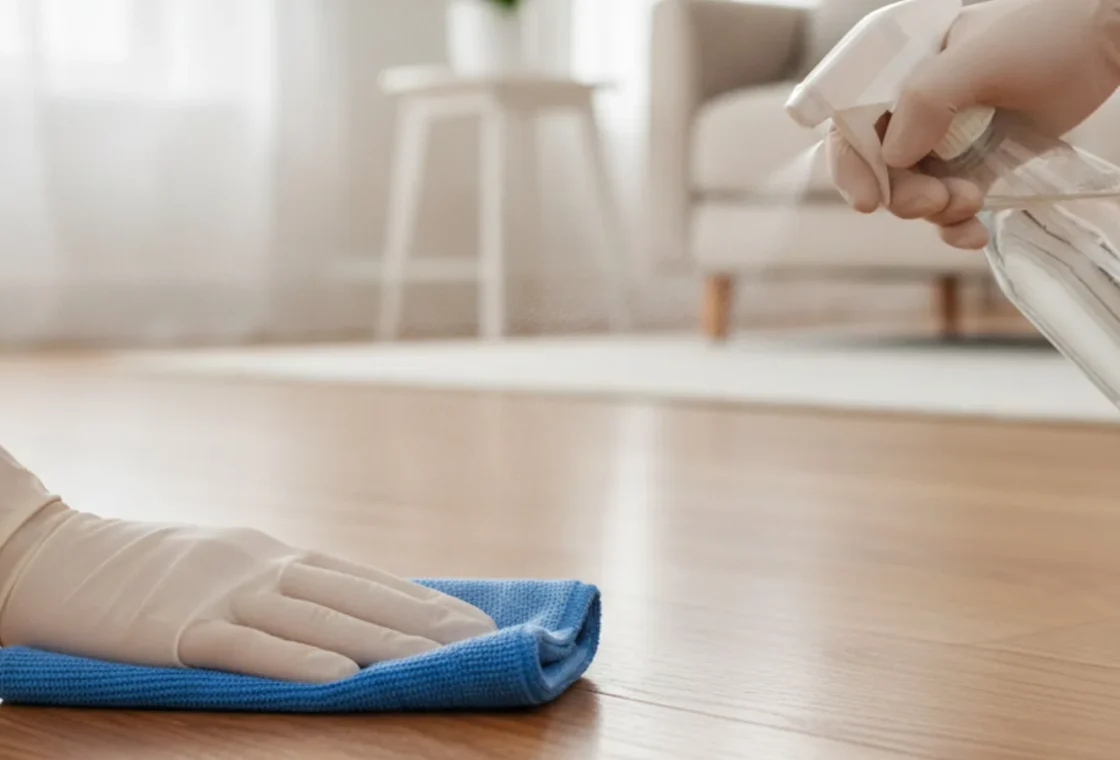
- Dampen the pad, do not soak it. Mist the microfiber pad or spray a light pass directly on a small section of floor. A correctly prepared pad should feel damp to the touch, never dripping. If you use a bucket, wring the mop until no water drips when you lift it.
- Work in sections, with the grain. Clean a few square feet at a time, moving the mop in long, overlapping strokes that follow the direction of the boards. Spray the floor lightly ahead of the mop rather than flooding the whole room at once.
- Keep your bucket or bottle behind you. Work toward an exit so you never walk back across a section you just cleaned. This avoids footprints and the blotchy re-deposited grime that creates streaks.
- Re-dampen or rinse often. Rinse or swap the microfiber pad every couple of passes so you are lifting dirt off the floor, not smearing it around. A dirty pad is a top cause of streaking.
- Dry the floor immediately. Follow with a clean, dry microfiber cloth or a dry mop head, buffing with the grain. The floor should be dry within a minute or two. Prompt drying prevents water spots, haze, and the slow moisture damage that shortens a floor’s life.
What cleaner should you use, and how do the options compare?
There are three broad choices: a commercial pH-neutral wood cleaner, a cautious DIY solution, and a list of things to keep off your floor entirely. The table below lays them out. “pH-neutral” matters because finishes are damaged by cleaners that are too acidic or too alkaline; neutral products clean without chemically attacking the coating.
| Option | How it works | Best for | Cautions |
|---|---|---|---|
| pH-neutral commercial wood cleaner (e.g. a dedicated hardwood-floor product) | Formulated to clean without stripping or dulling the finish; no rinsing or residue | All surface-sealed floors, including engineered; the safe everyday default | Match the product to your finish (sealed vs. oiled); confirm it is labeled pH-neutral and safe for your floor type |
| DIY: a few drops of mild dish soap in warm water | Very dilute surfactant lifts light soil; applied by light spray, then dried | Occasional use on sealed floors when no commercial cleaner is on hand | Use sparingly; too much soap leaves a dulling film. Mist, do not flood. Dry promptly |
| DIY: diluted white vinegar in water | Mild acid cuts some grime (vinegar sits around pH 2 to 3) | At most, rare and heavily diluted spot cleaning; see the vinegar debate below | Many flooring pros advise against it on polyurethane; repeated use can dull or etch the finish over time |
| Avoid: oil soaps and “mop-and-shine” products | Leave a glossy coating that builds up over repeated use | Nothing on modern sealed or engineered floors | Residue clouds the finish and can interfere with future recoating |
| Avoid: steam mops, wax on urethane, all-purpose/ammonia/bleach cleaners | Force moisture and heat into wood, or chemically harm the finish | Nothing | Steam can void warranties and warp boards; harsh cleaners strip and discolor finishes |
So what is the deal with vinegar?
The vinegar question deserves its own answer because the internet is split. Vinegar is a mild acid, usually around pH 2 to 3, and the concern on surface-sealed floors is that acidity can slowly etch and dull a polyurethane finish with repeated use. The pro-vinegar camp points out that a heavily diluted solution, used occasionally, cleans sealed floors without causing immediate, visible harm. The cautious camp, which includes most contractors and floor professionals, notes that there is no upside worth the long-term risk when pH-neutral cleaners do the job better and were designed for the surface. Reporting on this consistently finds professionals recommending dedicated wood-floor cleaners such as Bona over vinegar.
The honest synthesis: on a polyurethane or otherwise surface-sealed floor, skip vinegar as a regular cleaner. If you must use it for a one-off spot, dilute it heavily and dry immediately. And in every case, defer to your finish manufacturer’s guidance, since they set the terms of the warranty and know how their coating reacts.
Hardwood Floor Finish Types
The type of finish on your hardwood floor dictates the appropriate cleaning method and products.
| Finish Type | Water Resistance | Cleaning Method | Maintenance |
|---|---|---|---|
| Surface-Sealed | Most resistant | Damp microfiber mop, pH-neutral cleaner | No waxing |
| Oiled | Moderate | Minimal water, cleaner for oiled floors | Periodic re-oiling |
| Waxed | Least resistant | Buffing, no wet mopping | Stripping and re-waxing |
How do you clean wood floors without streaks?
Streaks come from three sources: grit you did not remove, too much liquid, and a dirty mop pad. Fix all three and streaks disappear. Dust thoroughly before any wet cleaning so there is no grime to smear. Use the least liquid that gets the floor clean, misting rather than flooding, because every extra ounce of water is extra residue waiting to dry into a film. Swap or rinse your microfiber pad frequently so you are removing soil instead of relocating it.
The finishing move is buffing with a dry microfiber cloth right after the damp pass, working along the grain. That dry buff lifts the last film of moisture and cleaner before it can flash-dry into a cloudy streak, and it is the difference between a floor that merely looks clean and one that looks clear. Harsh, high-residue cleaners and oil soaps also cause streaking, so sticking to a pH-neutral product helps here too.
How do you make hardwood floors shine again?
Shine is really a question of what has gone wrong, so match the fix to the cause. If the floor merely looks hazy or dull after cleaning, the culprit is usually residue, and a careful damp clean with a pH-neutral cleaner followed by a dry buff restores clarity on its own. Do not reach for a shine product to cover up a residue problem; you will only add another layer to cloud.
If the finish itself has lost luster across the whole floor, the next step depends on the finish. For a surface-sealed floor, a water-based floor polish or refresher made for sealed wood can fill micro-scratches and restore gloss; apply it thinly in overlapping, feathered strokes with the grain for an even, streak-free result, and confirm the product matches your finish. For an oiled floor, re-oiling is the equivalent step and brings back both sheen and protection. Never apply wax or acrylic polish to a glossy urethane finish; it does not bond and creates a mess that complicates recoating.
When polish no longer helps and you can see dull wear paths and fine scratches, the floor needs a professional screen-and-recoat: a light abrasion of the existing finish followed by a fresh topcoat, without sanding to bare wood. By rule of thumb this is needed roughly every several years in busy households, though actual timing depends entirely on traffic. When the wear reaches the wood itself, with gray or water-stained boards, only a full sand-and-refinish will restore it, and that is a once-in-many-years job best left to a professional, especially on thin engineered veneers that may not survive another sanding.
What are the biggest mistakes to avoid?
Most hardwood-floor damage is self-inflicted and slow. These are the habits that do it, and what to do instead.
- Using too much water. The number-one killer. A wet mop, a flooded bucket pass, or leaving the floor to air-dry all push moisture into the seams. Keep the pad damp, not wet, and dry promptly.
- Steam mopping. Marketed as safe and sanitizing, steam is among the worst things for wood: it forces hot moisture through the finish into the wood and glue lines, and can void warranties. Do not use it on any wood or engineered floor.
- Vinegar (or other acids) on polyurethane. Repeated acidic cleaning dulls and can etch a sealed finish. Use a pH-neutral cleaner instead.
- Oil soaps and mop-and-shine products. They build a film that clouds the floor and sabotages future recoats. Avoid them on modern finishes.
- Leaving spills and pet accidents. Standing liquid wicks into seams fast. Wipe spills immediately, every time.
- Vacuuming with the beater bar on. The rotating brush scratches finish. Switch to the bare-floor setting.
- Skipping the dust step. Mopping over grit grinds scratches into the finish and guarantees streaks. Always dry-clean first.
- Waxing a urethane-sealed floor. Wax will not adhere and can severely damage the finish. Wax is only for genuinely waxed floors.
- Ignoring the manufacturer’s care sheet. Generic advice is a starting point; the maker’s instructions are the rule, particularly for warranty coverage.
How often should you clean hardwood floors?
Frequency scales with traffic, pets, and shoes-on-or-off habits, but the NWFA’s general cadence is a good baseline. Dust-mop or sweep daily in busy areas to keep grit off the surface, since that grit does the most cumulative damage. Vacuum weekly on the bare-floor setting to reach the dust that collects along baseboards and between boards. Damp-clean with a pH-neutral cleaner on a schedule that fits your household: high-traffic kitchens and entryways may want it weekly, while low-traffic rooms are fine monthly. The guiding principle is to clean often with dry methods and damp-clean only as often as the floor truly needs, because every wet pass, however careful, is a small moisture exposure.
On the longer horizon, plan for periodic professional attention. A screen-and-recoat roughly every several years refreshes the protective topcoat before wear reaches the wood, and a full sand-and-refinish, needed only after many years or visible wood damage, resets the floor entirely. Staying ahead of the recoat is the cheapest insurance a wood floor has: it is far less costly than letting the finish wear through and forcing a full refinish.
When unsure of your floor's finish, default to dry cleaning plus a barely damp microfiber pad with a pH-neutral cleaner.
Your quick hardwood-floor care checklist
- Identify your finish first (water-bead test): surface-sealed, oiled, or waxed.
- Dust-mop or vacuum (bare-floor setting) before any damp cleaning.
- Use a pH-neutral wood cleaner; mist, do not flood.
- Keep the microfiber pad damp, never dripping; wring thoroughly.
- Mop with the grain in long, overlapping strokes, working toward the door.
- Dry-buff immediately with a clean microfiber cloth to kill streaks.
- Wipe spills the second they happen.
- No steam, no vinegar on polyurethane, no oil soaps, no wax on urethane.
- Follow the manufacturer’s care sheet above all generic advice.
- Dust daily, vacuum weekly, damp-clean as needed; screen-and-recoat every few years.
Clean hardwood floors are not fragile, but they are unforgiving of the wrong routine repeated over years. Keep water to a minimum, match your method to your finish, dry as you go, and the same boards will look right for decades.
Frequently Asked Questions
Can you use vinegar to clean hardwood floors?
Skip it as a regular cleaner on polyurethane or other sealed floors. Vinegar is a mild acid (around pH 2 to 3) that can slowly dull and etch the finish, and most flooring pros recommend a pH-neutral wood cleaner instead. At most, use it heavily diluted for a rare spot clean, dried immediately, and always defer to your manufacturer's care sheet.
Is it safe to wet-mop or steam-mop hardwood floors?
No. A sopping wet mop dumps more water than wood can handle, and it seeps into the seams to cause swelling and warping. Steam is worse: it forces hot moisture into the finish, the wood, and engineered glue lines, can void warranties, and should never be used on wood. Use a barely damp microfiber pad and dry the floor right after.
How do I clean engineered hardwood floors?
Treat the surface like solid wood of the same finish, but with even less water because the real-wood veneer is thin. Dust or vacuum first, then use a lightly damp microfiber pad with a pH-neutral cleaner and dry promptly. Avoid soap-based or mop-and-shine products, which leave a film, and never steam-clean engineered floors.
Why are my hardwood floors streaky after mopping?
Streaks come from leftover grit, too much liquid, or a dirty mop pad. Always dust before damp cleaning, mist rather than flood, rinse or swap the pad often, and buff the floor dry with a clean microfiber cloth along the grain immediately after. High-residue oil soaps also streak, so stick to a pH-neutral cleaner.
How often should I clean hardwood floors?
Dust-mop or sweep daily in busy areas to keep grit off the surface, vacuum weekly on the bare-floor setting, and damp-clean with a pH-neutral cleaner as the floor needs it (weekly in high-traffic spaces, monthly in quieter rooms). Plan a professional screen-and-recoat every few years before wear reaches the wood.